The Truth About TSS Turkey Loads
We discuss the pattern performance, physics, and field anecdotes that will help you better understand Tungsten Super Shot
By Alex Robinson
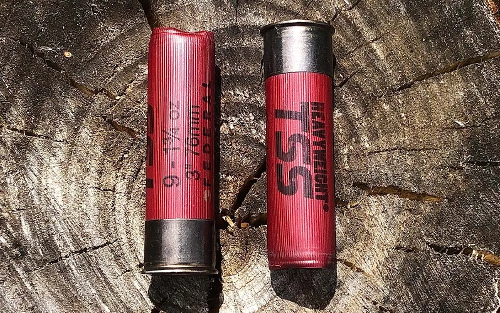
Tungsten Super Shot is the hottest thing to hit the turkey hunting world since the pop-up blind, but still, so many hunters don’t understand its performance — or its limitations.
In hopes of shedding some light on this very dense, wildly expensive, and unnecessarily controversial pellet material, I sat down with Adam Moser, the director of product engineering for shotshells at Federal Premium. Federal, after all, was the first major ammo company to widely offer TSS loads. I also caught up with my fanatical turkey hunting buddy Josh Dahlke, the VP of content for HuntStand. Dahlke has witnessed more than 100 turkeys get shot with TSS loads. If anyone can explain the physics behind TSS, it’s Moser. If anyone can detail its turkey killing capabilities, it’s Dahlke.
What Is TSS, Exactly?
The term TSS is reserved for a Tungsten-based pellet material that has a density of about 18 g/cc. For reference, lead shot has a density of about 11.2 g/cc. A TSS pellet is 95 percent tungsten and 5 percent nickel and iron — these metals help to bind the shot material. TSS is formed through metal injection molding, which can be roughly described as taking a mixture of metal powders and heating them up and then molding them into a spherical shape. The pellets are then hardened, ground, and polished for their final size and finish.
This manufacturing process and the cost of harvesting tungsten from the earth are what drive up the cost of TSS, Moser says.
“Lead is about 1 to 2 dollars per pound and tungsten is 30, 35, to 40 bucks per pound, depending on where you’re getting it from,” he says.
Are TSS Pellets Actually Heavier?
Size being equal, yes, TSS pellets are significantly heavier than lead pellets. However TSS pellets typically come in smaller shot sizes than what turkey hunters shoot when utilizing lead pellets. The most common pellet sizes for TSS are No. 7s and No. 9s. The most common pellet sizes for lead turkey loads are No. 5s and No. 6s.
|
Shot Material |
Pellet Size |
Weight per Pellet |
Pellets per Ounce |
|
Lead |
No. 5 |
2.5 grains |
170 |
|
TSS |
No. 7 |
2.3 grains |
188 |
|
Lead |
No. 6 |
1.9 grains |
225 |
|
TSS |
No. 9 |
1.2 grains |
362 |
As you can see in the chart, a No. 5 pellet is slightly heavier than a No. 7 TSS pellet and significantly heavier than a No. 9 TSS pellet.
So What Is the Advantage of Shooting TSS?
The real advantage of shooting TSS comes from pellet penetration and pattern density at distance. Let’s discuss penetration first.
Here’s the basic physics concept to understand: smaller, denser pellets retain velocity better and penetrate better than larger, less dense pellets. If you want the math on this, then Moser says it’s more useful for turkey hunters to look at penetration energy than kinetic energy. Penetration energy is the measure of pellet energy per cross-sectional area, Moser says. In other words, it is the kinetic energy of the pellet divided by its surface area, also referred to as the 2D area of the pellet (Ke=1/2 mv^2).
Here’s a sample of penetration energy generated from 1200 FPS muzzle velocity at 40 yards.
No. 7 TSS pellet: 535 ft-lb/in²
No. 9 TSS pellet: 374 ft-lb/in²
No. 5 lead pellet: 241 ft-lb/in²
No. 6 lead pellet: 205 ft-lb/in²
As you can see, both TSS pellet sizes carry far more penetration energy at 40 yards than the lead pellet sizes.
Pellets kill a turkey by penetrating its vitals, specifically the central nervous system (spinal cord and brain). You want to see several pellet strikes in the head and neck. A dense pattern is key and this is where TSS really outperforms lead, especially TSS No. 9 shot. Because of the small shot sizes TSS loads offer far higher pellet counts than lead turkey loads. Here’s a quick look at pellet counts.
|
Pellet Material & Size |
Payload |
Pellet Count |
|
TSS No. 9 |
1 3/4 oz. |
634 |
|
Lead No. 6 |
1 3/4 oz. |
394 |
|
TSS No. 7 |
1 3/4 oz. |
330 |
|
Lead No. 5 |
1 3/4 oz. |
298 |
Also, because TSS is so hard, there’s less pellet deformation, fewer flyers, and better overall pattern efficiency.
At What Distance Can You Kill a Turkey with TSS?
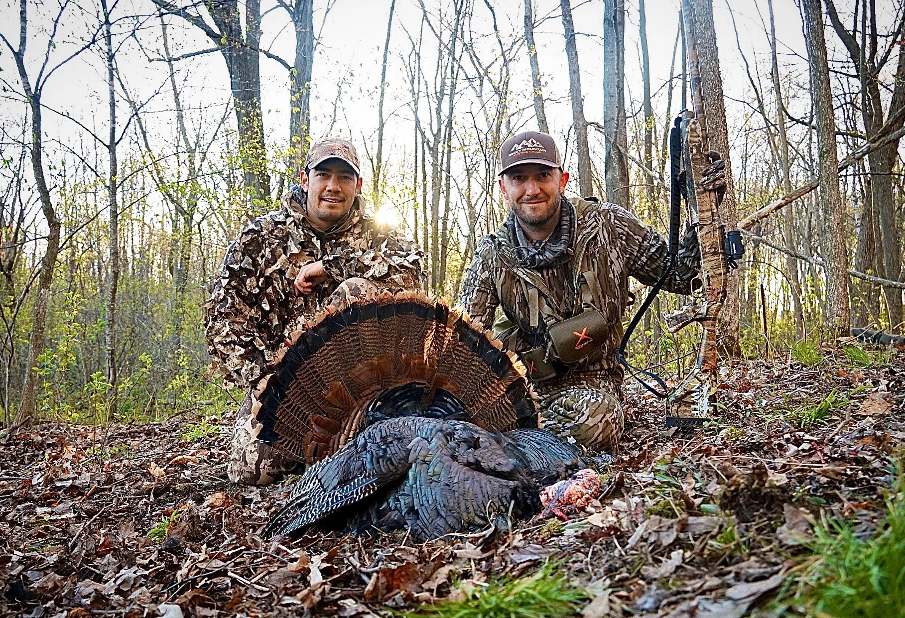
You’ll certainly hear tales of hunters killing turkeys with TSS at 70 yards and beyond. But this does not mean you should attempt shots at these ranges. Every hunter needs to establish their own maximum effective range with their setup and skills. With TSS the critical factors are pattern density (not penetration energy) and your shooting ability.
For an effective killing pattern, there’s a long-standing guideline of 100 pellets or more in a 10-inch circle. This ensures several pellet strikes in the head and neck, as long as you put the core of your pattern on target. The best 12-gauge turkey shotguns paired with an appropriate choke will accomplish this with a TSS turkey load from 40 to 60 yards. In my review of the best .410 turkey loads I was able to consistently put 100 or more pellets on target at 40 yards with several TSS load/gun combinations.
You might have to do some experimenting with different chokes and load combinations to make it happen. Just remember that if you optimize your pattern for long range, it will become ultra-tight at short ranges, which makes it much easier to miss a close-range bird.
So what about pellet energy? The traditional rule of thumb was that you need a minimum of 2.5 ft-lbs per pellet in order to kill a turkey. But this idea comes from a history of shooting lead loads and isn’t applicable to TSS pellets.
“Under that guideline, a No. 9 TSS pellet would not have enough energy to kill a turkey at 35 yards, which we know is not true,” says Moser.
Dahlke knows from years of field experience that a solid pattern of TSS will kill a turkey at 60 yards with good shooting, every time. And that’s where he sets his personal maximum distance. The only way to set your own max shooting distance is by doing some honest patterning work. Simply find the range at which you and your setup can no longer put about 100 TSS pellets within a 10-inch circle over the center of your target consistently, then don’t shoot beyond that range.
If all goes well, this will cost you about a box of turkey loads (which will be about $65 if you’re shooting a 12 gauge). My process is to first get my shotgun sighted in with cheaper target loads. Then I’ll shoot one TSS load at 40 yards. Assuming it throws a good pattern of about 250 or more pellet strikes within a 10-inch circle, I’ll move back to 60 and shoot three patterns. If at that range I’m consistently putting about 100 pellets inside a 10-inch circle over the heart of my target, then I know I’m good to go. If not, I know I have to limit myself to closer shots or start experimenting with different chokes and loads.
How to Catch Crappie: A Complete Guide
Whether fishing the pre-spawn in the spring or jigging through the ice in the winter, use these tips and tactics to start catching more crappie year-round
By Don Wirth
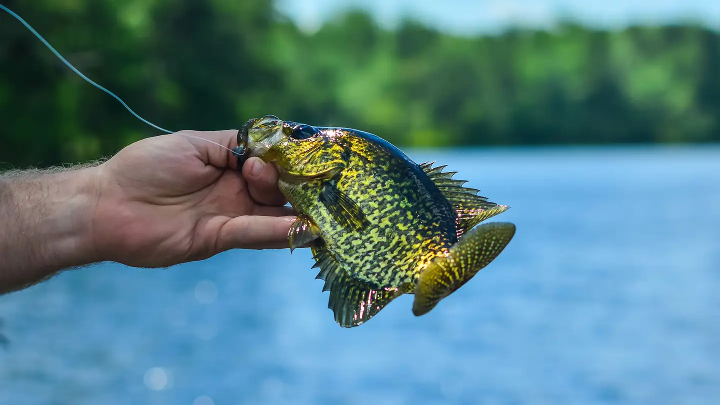
Crappie are one of the most popular gamefish in the U.S.—and for good reason. They’re fun to catch for anglers of any skill level, put up a good fight, and can grow to impressive sizes. If you don’t believe us, just check out these world-record crappie. They are also excellent table fare, and a full limit can provide for a delicious fish fry. Not to mention, these panfish can be caught all over the country.
With a few tips and tactics, you can start catching crappie year-round. We put together this everything-you-need-to-know guide to targeting crappie from spring to fall and then through the ice in the winter. Here’s how to get started.
How to Catch a Crappie: Table of Contents
Crappie Fishing in the Spring
Factors and Gear to Consider
How to Catch Crappie in the Summer
How to Catch Crappie in the Fall
Crappie Fishing in the Winter
How to Catch Crappie in (Almost) Any Weather Conditions
FAQs
Crappie Fishing in Spring
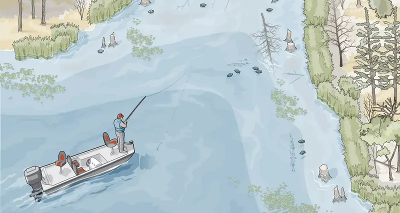
For the panfish angler, spring might as well be Christmas. Every year, hordes of crappie flock to the shallows to spawn. In the Northern states, this happens a month or so after ice-out or even during the last of the hard-water season. In the South the migration starts as early as February. Regardless of when it begins, anglers have a big window to target huge concentrations of fish during the pre-spawn feeding frenzy. Here’s what you need to know.
Factors and Gear to Consider
Water Temperature
No tool is more essential for success in spring than knowing the water temperature. Crappie migrate to the shallows once the water rises above 50 degrees, and they spawn when it’s well into the 60s. If you’re reading anything between 50 and 65, it’s a good time to hit the water.
Use Light Tackle for Spring Crappie
There’s no room in this game for anything except light or ultralight tackle to present tiny lures properly and to detect subtle hits. Small 500- to 1000-size reels with 4-pound-test line matched with a 6-foot ultralight rod will do the trick.
The Best Lures for Spring Crappie
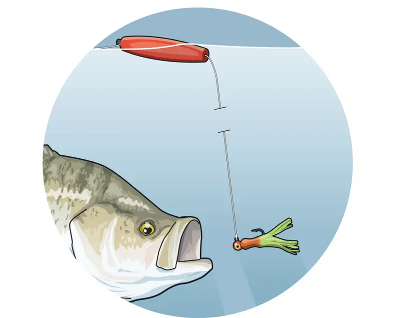
Presentation is critical, as pre-spawn crappie are often at specific depths and keyed into a particular forage. Small tubes and jigs can be fished as is or beneath a small fixed Comal Tackle cigar float to keep them eye-level with the fish. Try vertical-jigging these lures when crappie are holding deeper, and switch to the float as they move into the shallows.
Along with small tubes and jigs, small, suspending minnow baits also work great on early-season crappie. They can be worked slowly and kept in the strike zone; crappie may still be sensitive to cold water and not willing to move too far or fast to chase a lure. (For more on crappie bait, check out our picks for the best crappie lures.)
Fish in Shallow Water
As the water gets warm, crappie will keep pushing into shallower water. When your gauge reads in the low to mid-50s, fish flats that are between 5 and 10 feet deep. Once it hits the 60s, any part of the lake that has 18 inches to 3 feet of water will hold fish.
Locate Schools of Baitfish
Structure such as brushpiles and contour changes are key when you’re searching for pre-spawn crappie, which will use these areas as cover. But nothing is more important to them right now than finding food. Locate bait schools with your electronics. Shallow flats that hold bait in spring will likely have pre-spawn crappie not far behind. Look for flats adjacent to the main lake, particularly on the northern side, which will warm up quicker.
How to Catch Crappie in the Summer
Remember how awesome the crappie fishing was during the spring? The fish were spawning, bunched in the shallows thicker than fleas on a hound. You were catching slabs off stake beds and brush piles in every bay, cove, and flat. Then suddenly, just like somebody pulled the plug, it was over. Now you’re figuring it’s time to stash the crappie tackle until next spring.
Hold on. Even though the spawning bonanza has passed, there’s still plenty of great crappie action out there if you change your tactics. After the spawn, crappie follow submerged creek channels out of reservoir tributary arms toward the main bodies of lakes. Although they’re unlikely to be packed together now as they were during the spawn, they’re still in predictable places and respond eagerly to live bait and lure presentations. Here’s how to find these summer hangouts.
Use Crankbaits
When lake temperatures reach about 75 degrees, postspawn crappie will be scattered along the first dropoff they encounter adjacent to their bedding areas—12 to 18 feet deep is typical. These fish will be suspending now rather than holding tight to the bottom, so your best approach is to cover a lot of water by slow-trolling small crankbaits like the Bandit 100 and Bomber Model A. Target the deep ends of gravel flats, major points at tributary mouths, and creek-channel drops.
First scan these areas with your sonar and put marker buoys along channels and ditches to chart your route. Using soft-action baitcasting rods and 8-pound abrasion-resistant line, troll between 1.5 and 2.5 mph in a lazy S pattern, alternately sweeping the open water over the channel and banging bottom on top of the drop with your lures. When a fish strikes, don’t grab the rod and set the hook. A hard hookset may rip out the hook. Instead, pick up the rod and just start reeling. Don’t forget to take along a plug knocker to retrieve crankbaits that hang up in brushy cover.
Probe Channel Cover for Post-Spawn Crappie
With the lake topping 80 degrees, crappie will most often be hanging around deep creek and river channels. Look for them to be suspending near, or holding tight to, stumps, brush piles, and flooded standing timber adjacent to channels in 20 to 30 feet of water. Mark channel drops with buoys, then probe for crappie using a Kentucky rig (which basically consists of a bell sinker at the end of the main line with two dropper hooks above). Use cheap 30-pound mono as leaders off of the main line. The stiff, springy leaders will keep the two baits—whether you’re using minnows, jigs, or tube baits—from tangling. A bow-mounted sonar with the transducer attached to the trolling motor will help you stay on target. Lower the sinker straight down into the bottom cover and slowly reel it up, repeating as you progress along the channel. July crappie often suspend in a tower formation, and this presentation will catch fish from 30 to 10 feet deep.
Drag Offshore Humps for Summer Crappie
Even if lake temperatures exceed 90 degrees, you can still catch crappie by keying on offshore humps (submerged islands). Target those no shallower than 15 feet on top, especially if they rise out of deep water near a flowing channel. Crappie gravitate to the peak of the hump to feed on baitfish when current is being generated from the upstream dam, then they drop back to suspend off its deep sides once the turbines shut down.
Idle over the structure, marking it with buoys. Move to open water, let out about 40 feet of line with a Kentucky rig on the business end, and head back to the spot with your trolling motor, dragging the rig behind your boat. When you move across the hump and feel the sinker hit bottom, speed up slightly; if you haven’t felt the sinker drag for several seconds, slow down until you do.
Crappie suspending in hot water can be maddeningly slow to bite. When you spot a school on your sonar, you may have to approach it a few times from several different directions to entice a strike. A sudden change of speed can also trigger a bite. As the rig passes near the school, either speed up your trolling motor to quicken the presentation, or kill it so the rig sinks. Find the right combination, and you can get two hookups at once.
How to Catch Crappie in the Fall
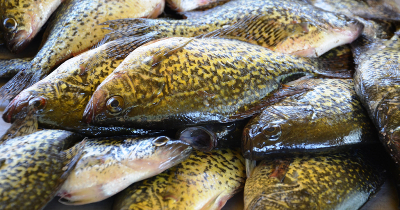
For many crappie fishermen, the only good thing about autumn is hunting season. They use cold fronts, reservoir drawdowns, and lethargic fish as excuses to trade their rods for bows or rifles. But you can still catch slabs this time of year, and veteran Tennessee guide Jim Duckworth can show you how to catch crappie. Here are his favorite fall tactics.
Tube Tricks for Fall Slabs
“Many Sunbelt reservoirs are lowered 5 to 15 feet in fall in anticipation of heavy winter and spring rains,” Duckworth says. “The drawdown forces shallow baitfish to relocate to steep riprap banks, where they feed on algae that coats the rocks. Hungry crappie gorge on these minnows.” He loads the boat by casting a 1 1⁄2-inch Berkley PowerBait Atomic Tube, rigged on a 1⁄8-ounce Blakemore Road Runner jig spinner, to the rocks with a light spinning outfit.
Fall Crankbait Tactics for Crappie
“A creek-channel dropoff bordering a shallow flat is also a likely place to find crappie now. They’ll scatter out over the channel after a cold front, then gang up along the drop to feed on passing bait schools.” Troll a 200-series Bandit crankbait on a soft-action bass cranking rod with 20-pound braided line at 2 to 3 mph. “Motor tight to the dropoff in a lazy S route,” says Duckworth, “so the lure ticks the outer edge of the shallow flat and then swims into the deeper channel.”
Use Spoons
“By the time the leaves fall and the lake’s surface temperature has dropped below 60 degrees, crappie will be fattening up on shad,” says Duckworth. “Use your fishfinder to locate baitfish schools suspending off points at the mouths of reservoir creeks, then jig a 1⁄2-ounce spoon just above the school. Rig the spoon on a 6-foot medium-action spinning outfit with 20-pound braid and a 2-foot fluorocarbon leader.” The bites will be anything but subtle.
Crappie Fishing in the Winter
During the hard-water season, everyone loves to wake up to an unseasonably warm air mass, near normal barometer, light wind, and bearable precipitation. Too bad that combination of conditions comes around so rarely. When Mother Nature throws a curveball on the day you plan to crappie fish, you have to make the call between toughing it out or sitting at home. Since no one really wants to do the latter, we spoke with an expert crappie fishing guide to see how he keeps the rods bent during the toughest conditions on the ice. His tips and tricks can teach you how to catch crappie all winter long.
How to Icefish for Crappie in a Blizzard
If the news is calling for a blizzard, the average ice angler is staying home. Kloet says that’s a huge mistake. Crappie and other panfish actually get very aggressive before and during a storm; you just have to know where to find them. According to crappie fishing guide Doug Kloet, crappie stay deep for most of the winter, sitting just off the bottom in 20 to 22 feet of water. As a storm moves in, however, the fish will move up in the water column, suspending as shallow as 5 or 10 feet. If you didn’t know to make that depth adjustment, you’d be fishing below the fish.
Kloet takes advantage of the crappie’s pre-blizzard aggression by upsizing his baits. Three-inch Rapala Jigging Raps are his favorite, but he notes that it’s essential to use light 2- or 3-pound monofilament to detect subtle bites and avoid line twist. Kloet likes to tip his Jigging Rap with a fathead-minnow head, as crappie are attracted to both the eyes and the scent it exudes. “Suspending crappie will almost always be stacked on top of each other,” he says. “Once we find them, we stay put.”
After the storm rolls in, fish are less likely to suspend in the water column and will move around with the baitfish. “Once you’re into the blizzard, they’ll be on the go,” Kloet says. He stays with the fish by drilling more holes but never ventures far from his starting point. The all-out blitz may be over, but the crappie will remain active until the storm’s end. Kloet downsizes to a Northland Mud Bug tipped with a spike during the blizzard; the smaller jig elicits more strikes when the crappie gets a bit more selective.
How to Catch Crappie in (Almost) Any Weather
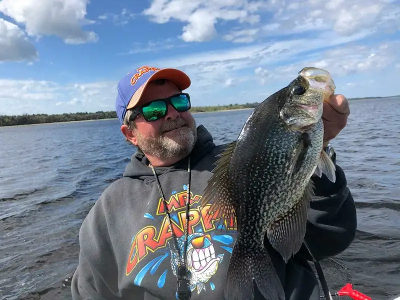
Crappie Tips for When It’s Hot and Muggy
Minnows fade quickly in the heat, so switch to tube baits. Look for towers of suspending fish at dropoffs down to 30 feet and probe them vertically with a Kentucky rig.
How to Catch Crappie in Windy Conditions
Wave action creates cloudy water perfect for ambushes, and crappie emerge from channels to prey on bait feeding on windblown plankton. Head to banks with nearby dropoffs and slowly swim a small white or chartreuse twister jig.
Fishing for Crappie When It’s Bright and Sunny
Under clear skies, crappie retreat from piercing UV light in brushy cover near channel drops. Fish straight down into the thick stuff with a Kentucky rig.
How to Fish for Crappie When a Front Is Coming
Before a storm, crappie school up to bird-dog wandering baitfish. Make multiple passes over channel drops until you find them on your graph, then troll crankbaits or slow-drift jigs through the school.
FAQs
Q: What time of day do crappie bite best?
Crappie feed in low light, so the best times to fish are at dawn and dusk. During colder times of year, though, try fishing during the warmest time of the day.
Q: What is the best depth to catch crappie?
This varies depending on the time of year and water temperature. A good general rule during the pre-spawn and spawning season is to go for 5- to 10-foot-deep water when the water temperatures are in the 50s and 18 inches to 3 feet deep when temps hit the 60s.
Q: What’s the best live bait for crappies?
Crappies will go for wax worms, crappie minnows, golden shiners, freshwater shrimp maggots, and more.
CONSERVATION: DU’S DEEP PRAIRIE ROOTS
Ducks Unlimited began its work in the Prairie Pothole Region 87 years ago, and this landscape remains its highest-priority conservation area
By Jennifer Boudart
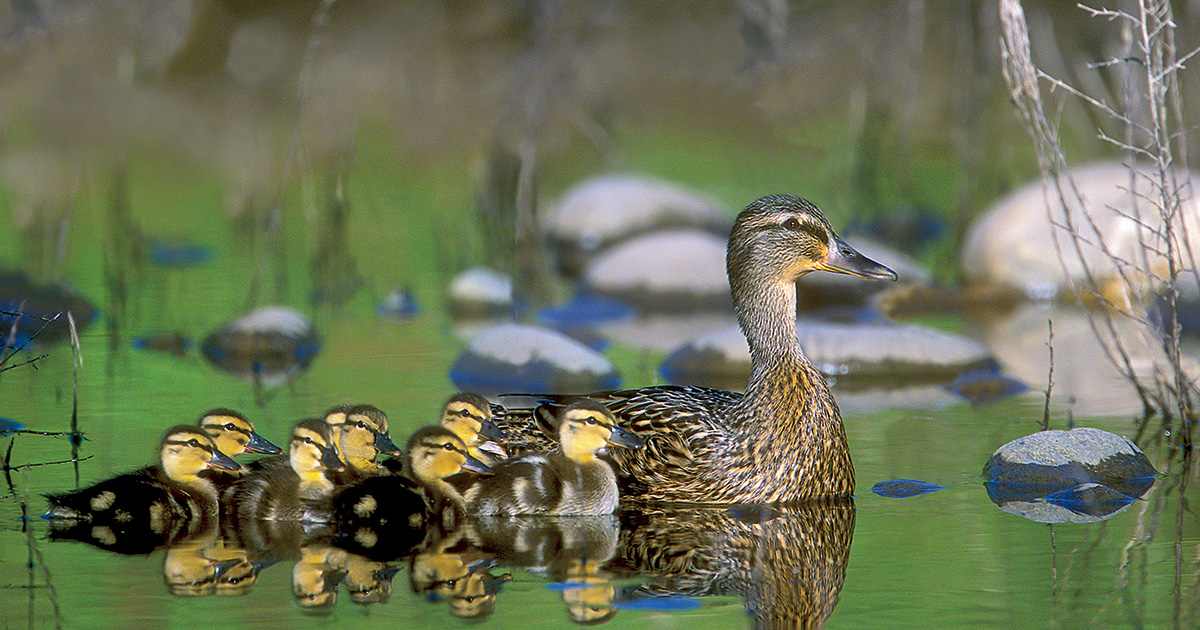
The Prairie Pothole Region supports more than half of North America’s breeding ducks, but the continuing loss of wetlands and grasslands threatens the area’s future.
The Prairie Pothole Region (PPR) is deeply entwined with Ducks Unlimited’s history. In fact, this landscape—nicknamed the Duck Factory for its importance to breeding waterfowl—has been at the heart of DU’s mission from the beginning. The first shovels to move dirt on behalf of the ducks were planted in prairie soils around Big Grass Marsh, northwest of Winnipeg, Manitoba.
The decision to deliver that inaugural project on the prairies—specifically, the Canadian portion of the PPR—was a very deliberate one, informed by the latest science. In fact, the plans were drawn up following a groundbreaking survey that had been conducted by four individuals who would later become DU’s founders: Joseph P. Knapp, John C. Huntington, Arthur M. Bartley, and Ray E. Benson. Concerned about the impacts of historic drought on the continent’s waterfowl populations and, consequently, their treasured hunting traditions, they launched an effort to put water back on the landscape for breeding ducks. To better understand where to direct those efforts, they organized a first-of-its-kind survey—conducted from both the air and the ground—of waterfowl in key breeding areas. They called this monumental survey the 1935 International Wild Duck Census.
The results painted a clear picture: The majority of breeding ducks settle each year in Prairie Canada, and that’s where the work should start. Furthermore, a new organization would be needed to raise funds in the United States to support that work. Ducks Unlimited Inc. was officially founded on January 29, 1937, in Washington, DC, and DU Canada was established a few months later in Winnipeg, Manitoba. In 1938, expansive construction projects got under way in Manitoba, Saskatchewan, and Alberta to restore water on large, previously drained wetlands. When DU began delivering conservation in the United States in 1984, the PPR was once again the initial focus.
Today, the PPR remains DU’s highest-priority conservation area due to its continental importance to breeding waterfowl. Decades of research has shown that nearly every year this region supports over half of North America’s breeding ducks. It’s also known that factors that influence waterfowl reproduction, such as nest success, brood survival, and hen survival, have the greatest impact on waterfowl populations. Ensuring healthy numbers of ducks requires conserving a healthy base of the birds’ key breeding habitats, specifically small “pothole” wetlands tucked into grasslands across the prairies.
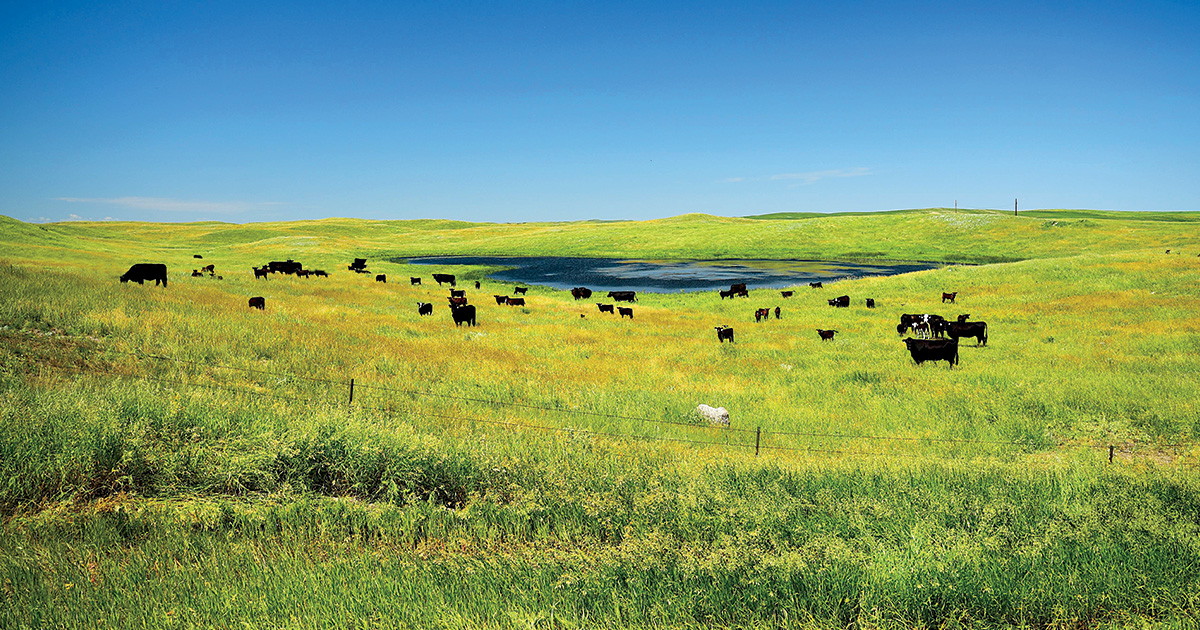
DU works closely with farmers, ranchers, and other partners on the prairies to implement voluntary conservation programs that provide habitat for wildlife.
To help conserve these vital habitats, DU works closely with farmers, ranchers, and other private landowners, who among them own 90 percent of the land on the prairies. Voluntary conservation easements and revolving land programs are two important tools used on both sides of the border. Conservation easements permanently protect wetlands and grasslands on private lands while still allowing some farming and cattle grazing. Revolving land programs make money available for DU to purchase land with the intention of selling it after habitat has been restored and conservation easements have been secured, often as desirable and much-needed grazing land for local cattle ranchers.
Landowners who aren’t interested in a conservation easement or sale of land but who wish to practice conservation can still partner with DU on various working lands programs. In Canada, these include forage conversion programs, tenure agreements on rangeland or grassland, and extension programs to help landowners be more cost-effective and more sustainable in their operations.
In the United States, DU’s Soil Health Program helps producers integrate regenerative agriculture practices into their operations, primarily through participation in Farm Bill programs administered by the USDA’s Natural Resources Conservation Service. DU and its partners provide financial and technical support for practices such as reducing disturbance in cropping systems, restoring wetlands and grasslands, and installing rotational livestock grazing infrastructure.
DU’s work throughout the PPR continues to be guided by extensive research that evaluates how to best support conservation programs on the landscape. Areas of study range from understanding effects of climate change to identifying factors that affect brood survival to quantifying ecosystem services provided by DU’s work. Cross-border cooperation between the US and Canada continues to be a hallmark of both DU organizations.
“The planning is very seamless,” says Dr. Johann Walker, director of operations in the Great Plains Region. “The basic philosophy is that the ducks don’t see the border and neither do we. We work together regularly on planning conservation and sharing ideas, and that collaboration ensures that we can keep the table set for breeding ducks from Edmonton, Alberta, to Des Moines, Iowa.”
Of course, this cooperation also involves outside partners. Through the Association of Fish and Wildlife Agencies Fall Flights program, state wildlife agencies financially support conservation work across Canada, where most of North America’s waterfowl are raised. Fall Flights hit a historic milestone in 2023, when every state in the Lower 48 participated for the first time. State contributions are matched by DU, leveraged to secure North American Wetlands Conservation Act (NAWCA) grants, and then supplemented by investments from Canadian partners. Last year, $5.16 million in contributions from state wildlife agencies generated roughly $26.8 million for conservation. To date, states have contributed more than $116 million through the Fall Flights program, which has helped to conserve more than 6.6 million acres of waterfowl breeding habitat across Canada.
DU is also leading the way in prairie conservation through its engagement in federal policies such as the US Farm Bill and NAWCA, as well as state and provincial policies that provide conservation funding like the North Dakota Outdoor Heritage Fund. “We want to amplify enthusiasm and appreciation for grasslands and wetlands among farmers, ranchers, constituents, voters, and legislators,” says Ryan Taylor, DU’s public policy director for North Dakota, South Dakota, and Montana. “Whether it’s state-based dedicated funding, the federal duck stamp program, or NAWCA, we work to ensure these dollars provide the greatest possible return on the investment for wildlife, people, and local communities.”
At the end of the day, Walker says, relationships with all stakeholders involved in conservation are the keys to DU’s success on the prairies and across the continent. “All these relationships we have—with landowners, other conservation entities, donors, and volunteers—have helped us become a leader for delivering conservation on private lands in the PPR.”
But Walker says now’s not the time for resting on laurels. “Our vision is to fill the skies with waterfowl today, tomorrow, and forever, and that’s simply not possible without intact prairie landscapes. The productivity of this iconic landscape for breeding ducks continues to be threatened by grassland loss and wetland drainage. We have to do everything we can to maintain and increase the region’s production capacity. There is no backup plan. There is no other Prairie Pothole Region.”
BIG GRASS
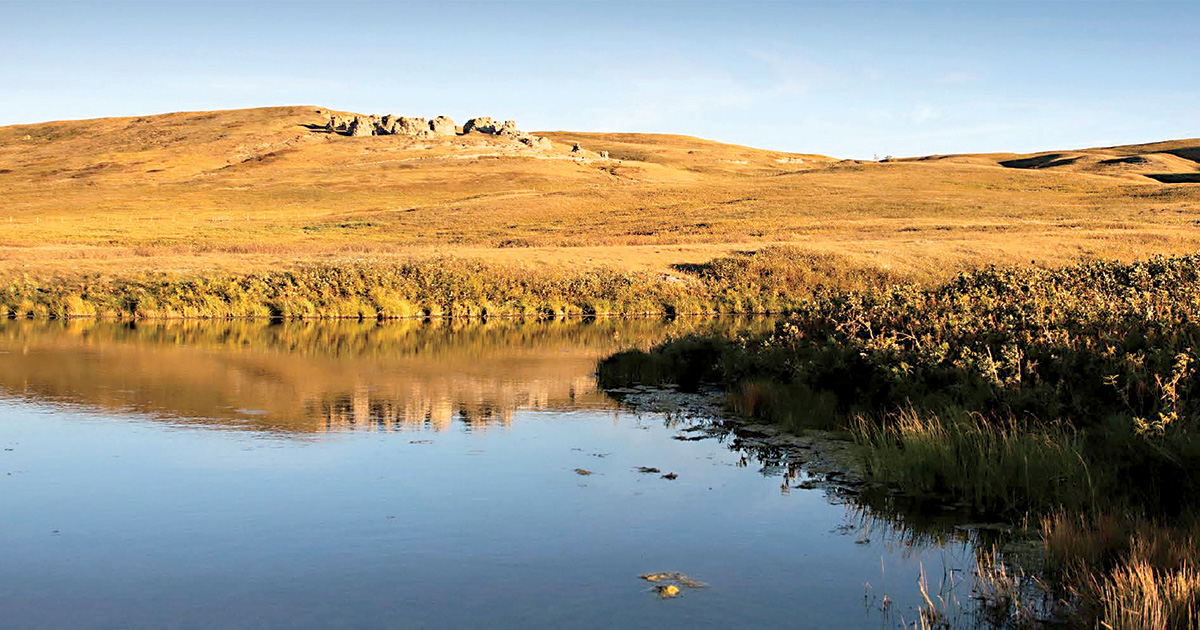
DU Canada secured its largest-ever conservation easement in 2023—on the McIntyre Ranch in Alberta—through a partnership with the Nature Conservancy of Canada and the Thrall family, who own the property. The parcel totals 55,000 acres and is one of the largest blocks of unbroken prairie left in Canada.
EXPLORING THE DUCK FACTORY
A closer look at the Prairie Pothole Region, North America's most important waterfowl breeding area
By John Pollmann
It was a late summer day when Bruce Toay and several other Ducks Unlimited biologists put on their waders and headed to one of the many wetlands on the prairies of north-central South Dakota. Toay and his team were there in search of ducks, and as they reached the edge of the little pond they saw them. Lured by the promise of an easy meal, these ducks had been captured in a swim-in trap made of tightly woven wire.
Amid a flurry of quacks and flapping wings, the biologists gathered the birds by hand and recorded some basic information about each of them, including species, age, and whether it was a drake or a hen. Then they placed a small aluminum band on one leg of each duck before releasing all of them back into the wetland with the hope, Toay says, that the band would someday be recovered, most likely by a hunter.
“The information we gain from band returns is extremely important. It plays a role in how ducks are managed and helps shed light on waterfowl migration across the continent,” says Toay, who is DU’s manager of conservation programs in South Dakota. “And over the years, these band returns have also helped us gain a better understanding of just how important this area is in terms of continental duck production. Because of band returns, we know that if you shoot a mallard in Kansas, or a pintail in Arkansas, or even a blue-winged teal down along the Gulf Coast of Louisiana, there is a good chance that it was hatched thousands of miles away—here on the prairie.”
The wetlands and grasslands found in this area of South Dakota are part of a larger area called the Prairie Pothole Region, also known as the Duck Factory, thanks to the region’s role in producing the mallards, gadwalls, pintails, blue-winged teal, canvasbacks, redheads, and other species that show up in the skies over all four major waterfowl flyways. What follows is a look at the habitat found within this region that is so vital for duck production, what Ducks Unlimited is doing to protect it, and why the Duck Factory is a great destination for hunters.
HABITAT DRIVES DUCK PRODUCTION
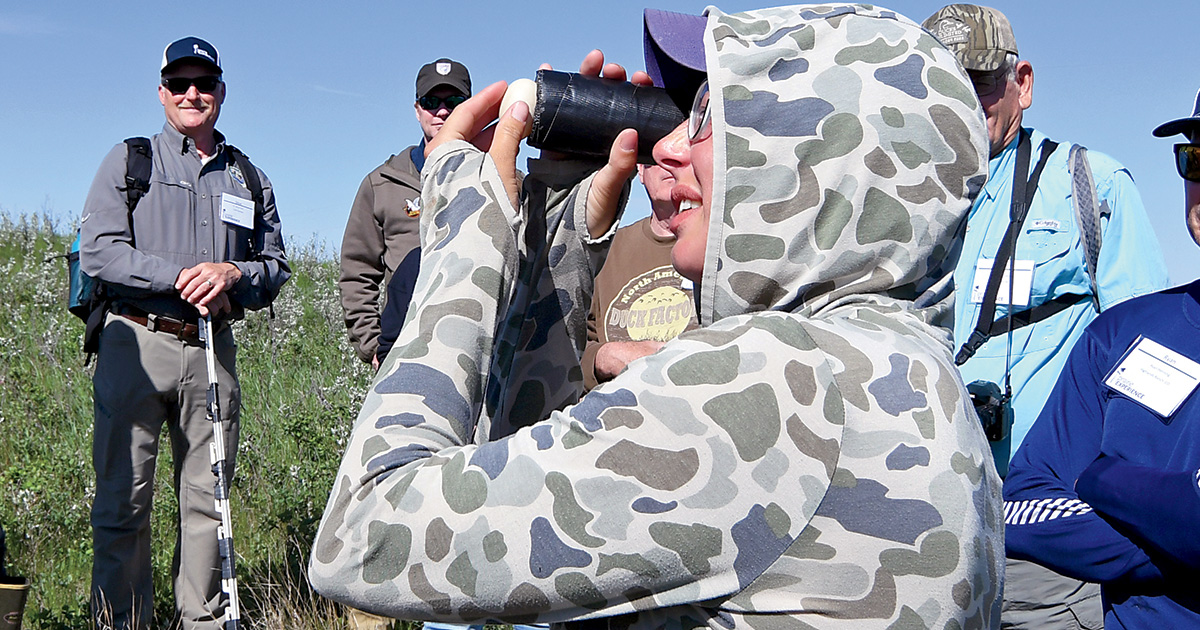
A DU biologist examines a duck egg to determine when it will hatch. Nesting hens produce large numbers of ducklings in areas with numerous small wetlands surrounded by grassland.
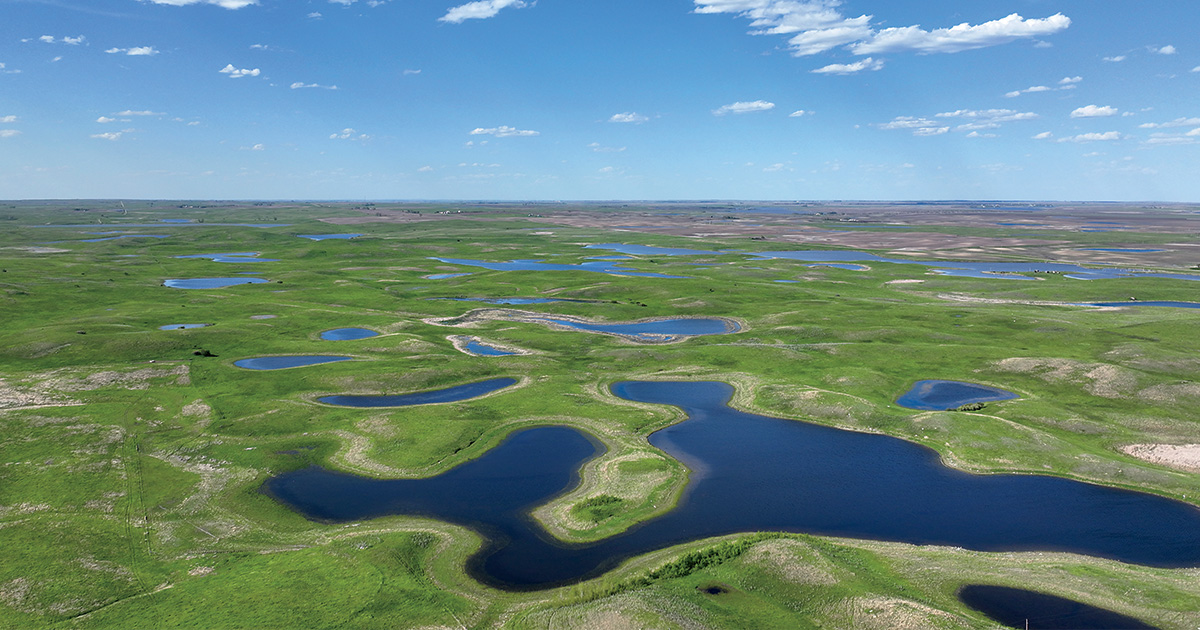
The Prairie Pothole Region is the heart of what was once the largest grassland landscape in the world, containing millions of pothole wetlands that were created as Ice Age glaciers receded some 10,000 years ago.
At first glance, these prairie potholes may not look like much. They are small and shallow, and many contain water for only a few months out of the year, but they are the engine that drives duck production in this area. “It all comes down to habitat,” explains Dr. Johann Walker, director of operations in DU’s Great Plains Region. “These small, shallow, seasonal wetlands provide much of the food and cover that breeding ducks need to successfully nest and raise their ducklings.”
In spring, mallards, pintails, and other waterfowl species return to the prairies as the pothole wetlands are beginning to thaw, and it’s there that female ducks find the invertebrates and plant seeds they need to recover from their long migration, produce eggs, and take care of them during the incubation period.
“Later, as ducklings begin to hatch, seasonal wetlands continue to provide important food resources and habitat for hens and their broods,” Walker says. “On landscapes with an abundance of healthy seasonal wetlands, brood-rearing females and their ducklings may not have to move as often or as far overland in search of food and shelter, and this reduces their vulnerability to predators and the elements.”
Research has shown that an abundance of seasonal wetlands is also associated with larger clutches of eggs and higher hatch rates, and should a hen lose a nest in one of these areas, she is much more likely to attempt to renest. So, when female ducks experience a breeding and nesting season with a large number of seasonal wetlands on the prairie, hunters can expect to see more ducks heading south in the fall.
“That is precisely what occurred during periods of the 1970s, 1990s, and 2000s, when water was abundant in the Prairie Pothole Region,” Walker says. “The impressive fall flights witnessed during these banner years would never have materialized without millions of small wetland basins on the prairie landscape, and this is why the conservation of small, seasonal wetlands is crucial to sustaining duck populations.”
CONSERVING THE DUCK FACTORY
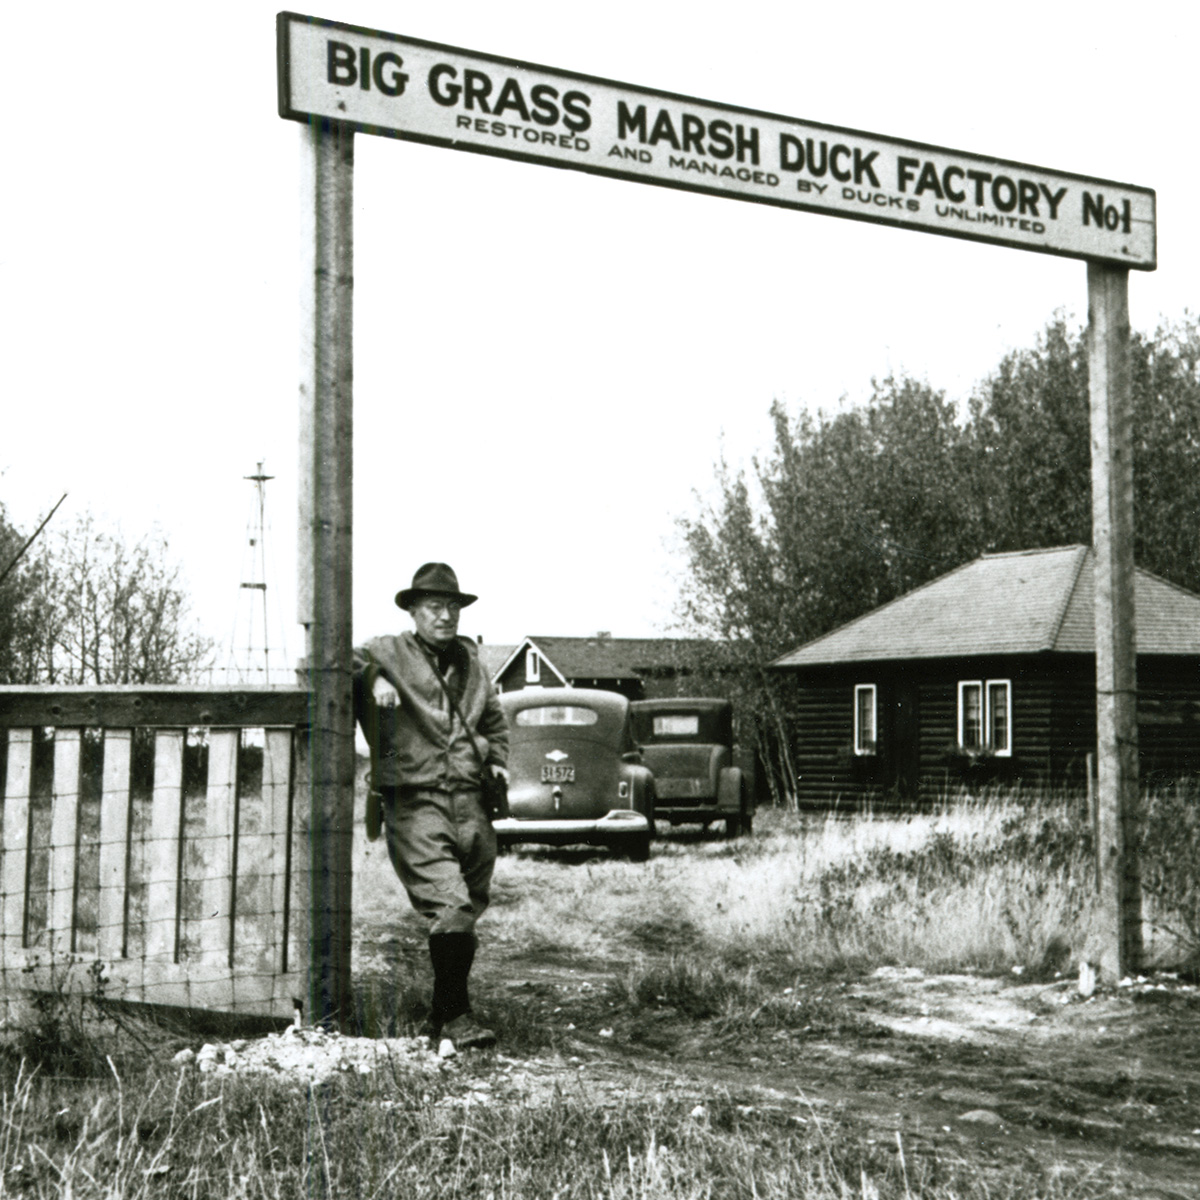
Ducks Unlimited was founded in 1937 to conserve wetlands in the Prairie Pothole Region.
Ducks Unlimited has been a leading voice for the conservation of the Duck Factory since 1937, when the organization was founded. Over the decades, DU has been committed to working with its conservation partners in Canada and the United States to restore and protect wetlands and grasslands across the entire Prairie Pothole Region and to support landscape-scale programs that benefit these habitat types.
“This is a landscape that is super dynamic, meaning that it may be wet in South Dakota and North Dakota for a couple of years, and then the precipitation patterns change and those states go dry, but then Alberta and Saskatchewan are wet, or Manitoba, and so on,” explains Dr. Scott Stephens, DU Canada’s director of regional operations for the prairies and Boreal. “At Ducks Unlimited we know that if we want to maintain duck populations at a high level, we need to keep the whole of the Prairie Pothole Region intact, so that when we get the right environmental conditions, the table is set and the ducks can do what they do.”
This work by Ducks Unlimited and its partners includes restoring wetlands that have been drained, returning native grasses to the landscape, partnering with landowners to protect those areas of remaining waterfowl habitat, and working with governmental leaders and agencies to support programs that benefit wetlands. This work also includes educating the public about conservation and highlighting the immense role that healthy wetlands play in promoting soil health, mitigating flood risks for communities, and other societal benefits.
“The Prairie Pothole Region is our highest priority,” Stephens says. “Keeping this habitat base intact is what Ducks Unlimited believes is the road for long-term, sustainable duck populations across the continent.”
HUNTING THE DUCK FACTORY
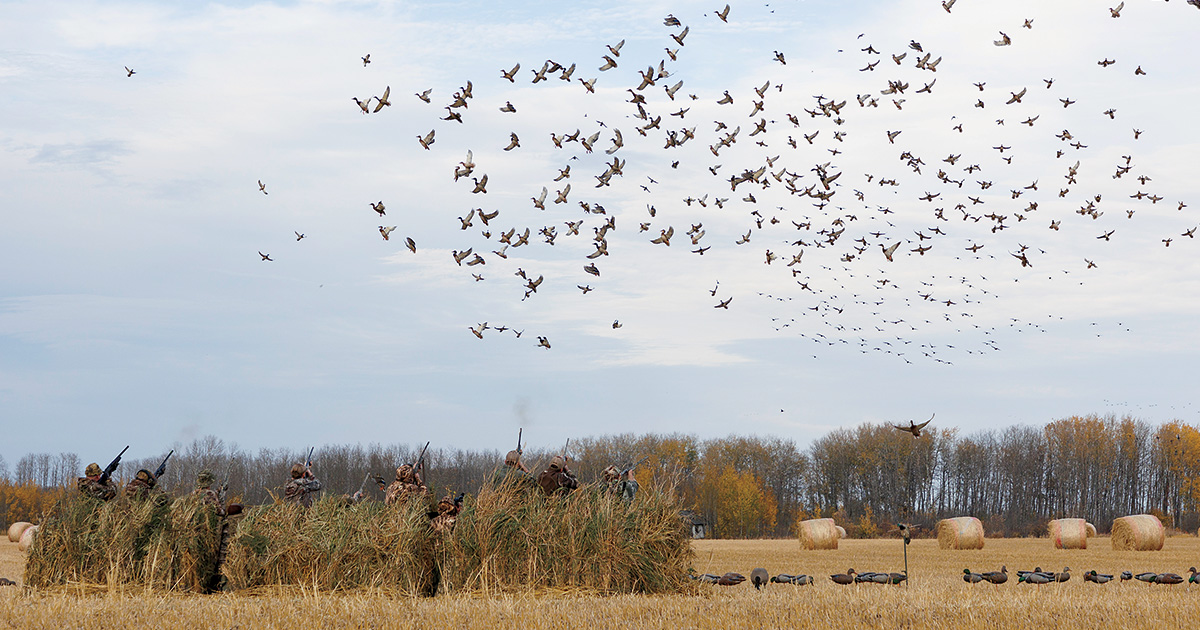
In addition to being a vital area for duck production, the Prairie Pothole Region is home to some fantastic hunting. And while there probably isn’t a wrong time to be in the Duck Factory during the hunting season, different times will produce different opportunities to target locally produced birds; migrating snow geese, white-fronted geese, and several subspecies of Canada geese; and numerous species of diving ducks and puddle ducks.
Early season on the prairie usually involves seeing a variety of species. On an early hunt in Saskatchewan, you might see mallards, pintails, and white-fronted geese in a field of harvested wheat or peas. In Manitoba, a marsh can be the setting for a classic hunt over decoys for redheads and canvasbacks. Meanwhile, in North Dakota, gadwalls, wigeon, and blue-winged teal may make up the day’s bag.
As the weeks go by and the weather turns colder, some waterfowl, including blue-winged teal, gadwalls, pintails, wigeon, wood ducks, and some species of geese, will begin heading south to warmer climates. At this time, the hardy birds that remain, primarily Canada geese and mallards, begin staging in large numbers as they prepare for their own southward departures. These large concentrations of birds can make for unforgettable hunts over decoys in fields of harvested corn, or on rivers or larger bodies of water.
Regardless of the timing, hunting the Duck Factory requires extensive scouting to find birds. Accessing private ground remains an option for hunters who politely ask landowners for permission, but this region also boasts a large number of areas that are open to public hunting. Veteran South Dakota hunter and guide Ben Fujan recommends having a good set of binoculars or a window-mounted spotting scope to help watch ducks and geese from a distance. “Because birds are changing up what they do from day to day, and because the weather conditions can vary so greatly, it is a good idea to come prepared to handle a variety of hunting situations,” Fujan says. “Layout blinds or A-frame blinds are good choices for hunters who want to be mobile and hunt new areas every day, and both blind styles can be used in dry-field situations or along the water. Having an ATV or another type of small utility vehicle can save a lot of time hauling gear to and from a hunting spot, especially in muddy or snowy conditions.”
Early or late, mallards or Canada geese, over water or in the field, the Duck Factory is truly a waterfowl hunter’s paradise. And in terms of wetlands and the future of duck production, the Prairie Pothole Region is worthy of protecting and conserving to ensure skies full of waterfowl today and tomorrow.
A Montana Man Cloned and Illegally Bred Giant Hybrid Sheep for Captive Hunting
Arthur “Jack” Schubart pleaded guilty to two trafficking felonies under the Lacey Act. He faces up to five years in prison and $250,000 in fines
By Sage Marshall
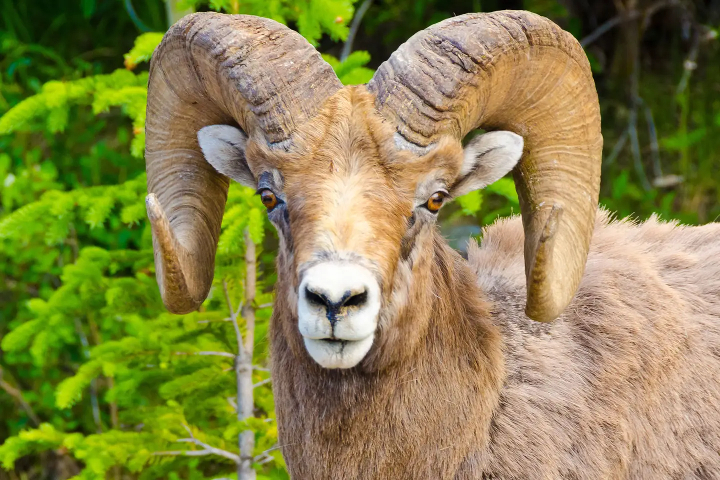
A Montana man recently pleaded guilty to two felonies after an elaborate and illegal scheme to create a hybridized super sheep to sell to high-fence hunting preserves. According to a U.S. Department of Justice press release, Arthur “Jack” Schubarth, 80, of Vaughn, Montana led a “yearslong effort to create giant hybrid sheep for captive hunting.”
Schubarth imported body parts of Marco Polo sheep from Kyrgyzstan without declaring them. “Marco Polo argali are native to the high elevations of the Pamir region of Central Asia. They are protected internationally by the Convention on International Trade in Endangered Species, domestically by the U.S. Endangered Species Act and are prohibited in the State of Montana to protect native sheep from disease and hybridization,” explains the U.S. Department of Justice.
Schubarth is the owner of a 215-acre, where he breeds “alternative livestock” to sell to high-fence hunting preserves. He sent DNA from the illegally imported Marco Polo sheep parts to a lab to create cloned embryos, which he then implanted into ewes on his ranch.
He managed to successfully birth a genetically pure Marco Polo ram, which he called the Montana Mountain King. His goal was to “create a larger and more valuable species of sheep to sell to captive hunting facilities, primarily in Texas”, the Justice Department press release states. Schubarth even sold the Montana Mountain King’s semen directly to breeders in other states.
He then reportedly worked with other conspirators to artificially impregnate other species of ewes. “This was an audacious scheme to create massive hybrid sheep species to be sold and hunted as trophies,” said Assistant Attorney General Todd Kim of the Justice Department’s Environment and Natural Resources Division (ENRD). “In pursuit of this scheme, Schubarth violated international law and the Lacey Act, both of which protect the viability and health of native populations of animals.”
Schubarth also illegally bought and sold wild Rocky Mountain bighorn sheep parts. The Lacy Act prohibits the interstate trade of wildlife that was taken, possessed, transported, or sold in violation to federal or state law. It also prohibits the interstate sale of falsely labeled wildlife.
For his crimes, Schubarth faces up to five years in prison, three years of supervised release, and $250,000 in restitution. “The kind of crime we uncovered here could threaten the integrity of our wildlife species in Montana,” said Ron Howell, Chief of Enforcement for Montana Fish, Wildlife & Parks. “This was a complex case and the partnership between us and U.S Fish and Wildlife Service was critical in solving it.”

