Pages: 1 ... 15 16 [17]


DIY: How to Plant a No-Till Food Plot

by Steve Bartylla   


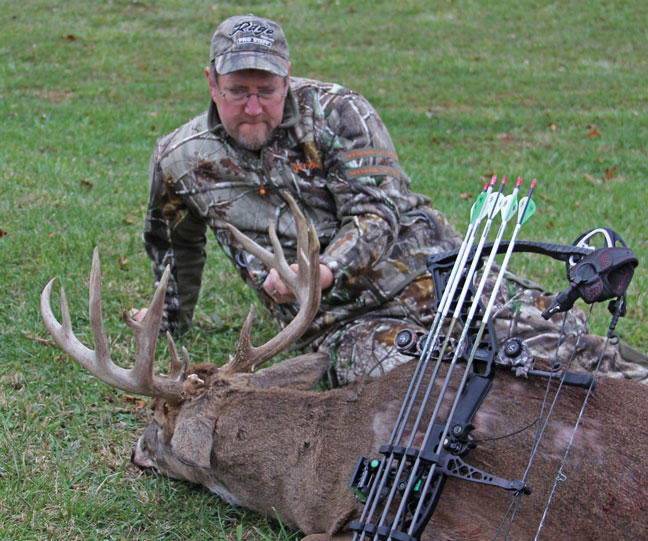
The stand overlooked a plot split between Antler King's Trophy Clover and Honey Hole products. It's always been one of the hottest stands on this particular piece of ground, so I wasn't shocked to see my Reconyx held photos of the buck I was after.

My stand sit was as close to a disaster as it could be. Despite my squeaky stand, two flocks of turkeys, a bobcat and my own personal dose of mistakes, somehow a "hot" doe kept coming back each time something new spooked her off. With the food being too good to resist, she was seemingly un-spookable. And the same lovestruck buck followed her in each time. That is, until my Mathews sent a Rage Xtreme-tipped Easton into flight.

food-plots-no-till-rewards

The rewards of a quality food source. Photo by Steve Bartylla

Most food plot users can, after witnessing for themselves the benefits, fully understand the difference a thriving food plot can make. When laid out and hunted correctly, food plots can produce thrilling hunts, often when odds are stacked against the hunter.

The most inaccurate misconception when it comes to food plots is that they're too expensive for the average hunter to plant and maintain. In reality, food plots don't have to cost an arm and a leg. In fact, on the four acres of food plot on which I arrowed this buck, name-brand seed was used, but it still was put in for under $200. As a cherry on top, the method used to install this plot offers benefits to the soil, and the planting requires nothing more than a backpack sprayer and hand seeder. Here's how to pull off food plots on the cheap.

Read More


10 essential turkey calls


Read More


Deer Management: There's No Off Season

by Matt Haun   

When most hunters think of whitetails, the first season that comes to mind of course is fall. It's to us what Black Friday is to an avid Christmas shopper — except we get to enjoy it a lot longer than one day.
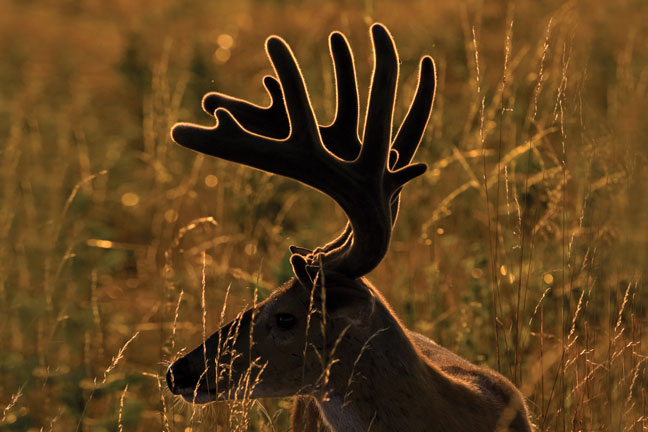
deer-management-through-the-year

You can't hunt whitetails every day on the calendar, but there's no off-season when managing them.

The great thing about deer management is that the least amount of work is required in fall. That is, if you've made good use of your free time the rest of the year. To get the most out of your deer season, here's what you should be doing in other, less cool (pun intended) times of year on your hunting property.

SPRING
As a deer manager, I consider spring — roughly mid-March through June 1 in the South, mid-April through mid-June in the North — to be the most critical season for management. Cells are beginning to divide and grow into velvet racks, fawns are being born, does are nursing, trees are blooming and forests are coming alive after winter. Regardless of your geographic location, the health of your herd is largely a result of what happens in spring.

This time of year, the name of the game is nutrition. There are three methods for increasing available nutrition in spring:

1. Food Plots
Plant large-seeded legumes, such as forage soybeans or lablab, and ensure the plants can grow to "forage size." That means either planting enough acreage that your herd won't mow the plots to the ground or protect them until the plants are big enough to sustain substantial browse pressure.
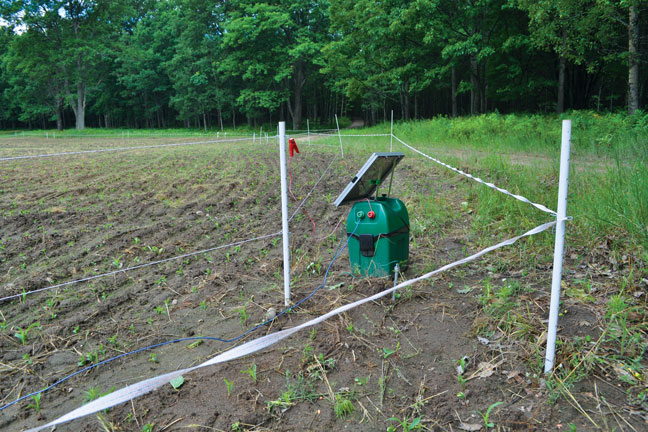
Year-long-deer-management

If you have so many deer that they wipe out smaller spring food plots, consider planting far more acreage or using portable fencing to protect plants early. Photo by Gordon Whittington

An average acre planted in either forage beans or lablab will produce in excess of 5 tons of deer food over the growing season. Although these seeds can seem expensive, rest assured that if planted properly and protected where needed, they're among the best sources of whitetail nutrition.

2. Supplemental Feed and/or Minerals
While not universally legal — check local regulations before you do anything listed below — supplements can help many deer herds. Not every tract of land has openings significant enough to justify planting spring food plots, but if it's big enough to hunt, there's at least space for a seasonal feed station.

When feeding, the specific brand of deer pellet isn't as critical as its contents. There are many high-quality products on the market today. The key components to look for in a spring deer feed are at least 17 percent crude protein, 4 percent fat and 10 percent fiber. You also want a good mineral pack with proper ratios of calcium, phosphorus, magnesium, salt and other trace minerals.

3. Fertilizer
Areas you burned, chopped, cut or mowed in fall/winter now are gathering much-needed sunlight and attaining the soil temperatures require for good plant growth. Early spring is a great time of year to fertilize these "natural food plots."

Lime and fertilizer go a long way toward making native vegetation more palatable and nutritious for deer. When applying fertilizer on young, succulent plants, make sure you do so just prior to, during or immediately after a rain event.

SUMMER
Fawns now are growing at a rapid pace, and antlers are starting to take their final shape. Your groundwork for summer has been laid by hard work in spring to get your nutrition plots in, supplemental feed program started and natural habitat fertilization taken care of.

Maintenance
The keyword in summer is maintenance. That includes maintaining food plots to control browsing pressure and assure longevity, as well as controlling weeds. If you've protected your young legume plots with fences, summer is the time for those barriers to come down, allowing deer to browse the more mature plants. If your fields are large enough to have not needed such protection, weed control is likely your priority.

Interestingly, any protective structure (electric or high fence) usually goes a long way toward keeping weeds at bay. Minus early browsing pressure, many planted forages can outcompete weeds. Consider this when evaluating the cost of a plot-protection system. Where legal, supplemental feed and/or minerals should continue to be available on a free-choice basis.

deer-management-food-plots

Summer is largely a time for maintaining habitat and prepping for deer season. Mow to help control undesirable plants and open up hunting access.

Summer's also a good time for general land maintenance, such as road mowing, pruning archery sets, killing wasps in box stands, cleaning up downed trees, etc. You even can get a jump on fall plots by applying herbicide and plowing in August, helping plots "bank" soil moisture before fall planting. But don't plow your beans/lablab in summer — turn only those plots that weren't planted in spring.

FALL
Testosterone levels are rising, triggering antlers to harden and velvet to peel. Fawns' spots are fading, and your excitement level for deer season should be on high.

But fall isn't all fun and games, especially in September. It doesn't matter if you're in the North or South. September means two things: camera surveys and hunting food plots (or at least prepping to do so, where seasons open later).

Camera Surveys
Not everybody will do a comprehensive, scientifically valid trail camera survey of their deer herd, and that's understandable. But I'd venture to say almost every deer hunter today is familiar with trail cameras and their worth as a management tool.

I believe a well-run camera survey is perhaps the greatest management tool a landowner or land manager can use. It can tell us the buck:doe ratio, age structure of bucks (and, to some extent, even does), herd density and fawning rates. Of course, cameras also can help tremendously in figuring out where deer live and how to hunt them.

It's my belief camera surveys should be run after bucks have shed their velvet, thus providing photos in hard antler and also in the body condition form/shape bucks are likely to be seen in during hunting season.

Information on how to conduct a survey or who can do it for you is easily found on the Internet. If you don't run a full survey, at least decide on harvest objectives with other hunters on the property and use the photos to set realistic goals on which deer to harvest and which to pass on.

Fall Food Plots
I'd say 85 percent or more of deer hunters only plant food plots for fall. The reason is simple: That's when deer season is, and people like to hunt around food sources. Food plots are legal in every state and province whitetails inhabit, and their attractiveness makes them extremely popular with hunters.

But fall plots also serve another purpose: They provide nutrition for deer going into the key winter stress period. This nutrition is important for post-rut bucks and newly bred does, as well as fawns, helping them reach spring in good condition.

I prefer to plant commercially available mixes in my fall plots, offering a variety of plants. A mix with cereal grains, brassicas and clover covers my bases from September (young, succulent cereal grains) all the way into June (lush clover) and everything in between.
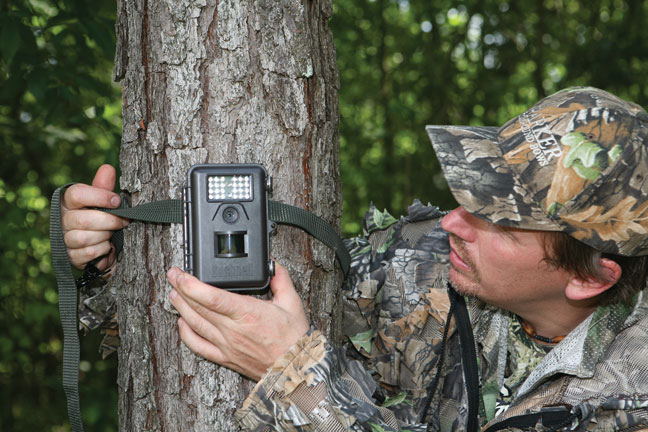
deer-management-includes-trail-cameras

While most fall use of trail cameras involves finding and patterning deer to hunt, these tools also can yield key data for managing whitetails. Photo by Ron Sinfelt

Planting rates and germination timing are important in fall plots. If a mix suggests a planting rate of 45 pounds/acre, don't plant 80 just because you have that much seed. The resulting plot will be dominated by whatever plant in the mix the deer tend to stay away from early, thus eliminating the variety in the plot and making it virtually a monoculture. This is the most common mistake I see in fall food plots.

The other big mistake I see a lot of is planting on a scheduled "work weekend," instead of waiting for conditions to be right prior to planting. Sometimes this can't be helped, and timing in the fall is slightly less critical than timing in the spring planting (due to drought). But if you can choose, the very best time to plant a fall food plot is just after a rain into moist soil — especially if you already have cooler nighttime temperatures.

WINTER
For most hunters, as winter hits, deer season is winding down, and there are a lot of "it's the holiday season . . . you need to be home more" arguments being made. So for the sake of happier marriages, I'll define winter as Jan. 2 - March 1, regardless of geographic area.

This also coincides with the dormant season for trees. That's important to note, because trees will be the focus of our winter management efforts. Whether you're pruning existing trees, transplanting preferred species around the property, planting new orchards, reforesting clearcut land or using prescribed fire, you should be doing it during winter.

Planting hard and soft mast (fruit) trees can be a great way to attract deer to your property all year, as well as potentially provide you with great places to hunt. First, you have to choose the area in which you'd like to establish your orchard or grove. When selecting a site, remember all mast-producing trees thrive with exposure to the sun, so as a general rule you want to plant them "facing" south or with a southern exposure.
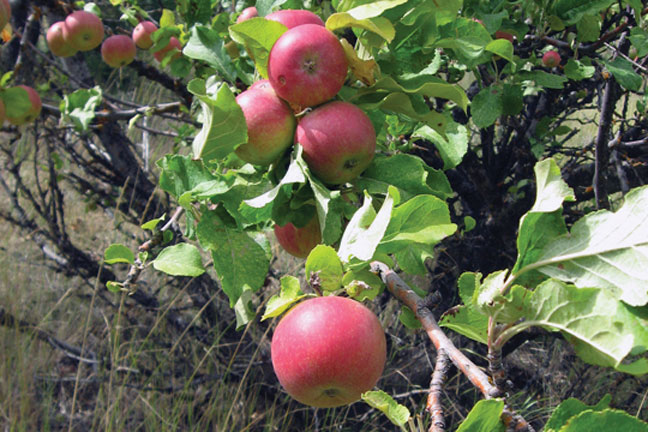
soft-mast-deer-management

Planting fruit trees during the dormant days of winter can help your herd — and your hunting — down the line. Photo by Gordon Whittington

I like to plant groupings of trees that eventually will provide attractive food from August into December, thus remaining attractive for the bulk of deer season. The way to do this is through variety. In the South, I like plums, pears, grafted persimmons, oaks and chestnuts; in the North I like the same varieties but generally substitute apples for pears, as they tend to produce better in places with long, cold winters.

Budget and patience will likely be the deciding factors on the sizes of trees you plant. A happy medium is to plant one to two large-class trees per orchard, so you can have instant gratification and in many cases produce fruit the first growing season. Remember: Most trees (especially those yielding soft mast) produce more fruit when cross-pollinated with a similarly timed tree of a different cultivar. Always plant fruit trees in groups of two or more for this reason.

IN CONCLUSION
Spring, summer and winter all wish they could be fall, but somehow they always come up short in a hunter's eyes. However, fall success might well be dependent on the work you complete in those other seasons.

If you only take away one lesson from this article, it should be this: The deer you hunt in fall aren't grown then. But we can have a tremendously positive impact on herd health and buck quality by providing adequate nutrition each spring and maintaining that nutrition through summer, while deer are growing. Then, in fall, we can use modern management tools such as game cameras to plan our hunts and harvest as well as plant plots to carry deer through the rigors of winter.

Finally, in winter we can use dormancy to our advantage and take care of all matters concerning trees and their production, which will ultimately lead to better nutrition.
In short, there's always something to be doing with deer. So let's get started doing it!

 

Turkey Hunting 101: Put the Sun at Your Back to Kill a Gobbler


You already know to tuck into the shade when you are calling a wild turkey to your location. The shade helps hide your outline and masks movements that might be spotlighted in direct sun.

But the other reason shading-up works when calling spring gobblers is because when the sun is behind you, it's shining directly on an incoming bird, and a sunstruck tom is as compelled to strut and display in the open as a school-age ballerina is to pirouette when the music starts.

Don't believe me? Then spend a sunny day watching turkeys. They pitch down from roost limbs shortly before sunup, but the entire flock generally migrates to a sunny glade or field edge. The demure hens may stick to the shade, but it's a good bet the toms will find any sunshine available in which to strut and fan. In the middle of a hot, still day, birds may find shade in the middle of the afternoon, but gobblers almost always find a sunny spot in which to display in the last hours of the day.

MORNING SETS: GET EAST OF THE BIRDS
Use that tendency to your advantage when you set up in the mornings. Make sure that birds—either on the roost or in these morning strut zones—are to the west of your set-up, so that you can remain in the shade and the gobblers can keep the sun on their feathers as they approach your call.

If you have a jake or gobbler decoy, set it up facing either southerly or northerly, so that the sun can play on its surface and incoming gobblers will think that a rival is stealing their place in the spotlight.

EVENING STRATEGY: APPROACH FROM THE WEST
Turn this sun-struck strategy around in the evening. Before they fly up for the night, gobblers want to display in the strong light of the late afternoon and evening, and they'll gravitate to spots that get direct light from the setting sun.

In these cases, you want to approach from the west, with the sun over your shoulder. Why not simply set up a ground blind or tuck into the base of a tree for these evening birds? Because these afternoon strut zones can be hard to predict—they're typically on the way to roost trees, but that route can change from day to day. So hunting evening birds is often a matter of moving to wherever they are.

I employed this strategy last week in Montana. I had hunted the morning and mid-day without success, but I had a hunch where birds would be roosting, on a high ridge above a well-watered creek.

I circled around the ridge so that I could approach it from the west, and every 100 yards or so, I'd stop and make a series of loud yelps on a long box call. (Paul Butski's "Morning Wood" call, to be precise - this is one of the best calls at piercing the afternoon breeze on the open prairie.)

After maybe a dozen of these searching calls, I finally got a response, and just as I anticipated, it was from a gobbler strutting on a large west-facing slope. In my experience, evening gobblers aren't likely to rush into a call; they're more likely to maintain their position, strutting and looking for the responsive hen.

Knowing that, I called every time I halved what I thought was the distance to the gobbler, and as I closed in, he responded with double and triple gobbles at my yelps.

Getting within shotgun distance was a matter of again using that western sun to my advantage. I stayed on the eastern side of cover, moving in the shade, and when I got underneath the ridge where the gobbler was, I used the terrain to hide my approach.

Finally, I got set up on the shady side of a ponderosa pine, made one final soft yelp, and the gobbler appeared over the lip of the ridge, exactly 39 steps to the east.

The last thing he heard was an alarm putt from my mouth call that compelled him to lift his head. And the last thing he saw was the big golden sun, just setting over my shoulder in the west.

Photo by the author.


How to stay on target when turkey hunting

Every spring, many turkey hunters leave the woods dejected, wondering how they missed a 20-pound bird with a shotgun spraying up to two ounces of pellets. There's the problem: modern turkey guns, chokes and shells don't spray pellets. Instead, they throw a small, dense pattern, which is only an advantage if you can actually hit what you're aiming at.


Remember, a turkey's kill zone—its spine and brain—is only the size of a grape sitting on a pencil. Since you're shooting a tight swarm of pellets at such a tiny target, you should think of your shotgun as a rifle, and sight it in like one. There are many wonky-shooting smoothbores out there, so you need to verify that your shotgun indeed hits where you think it does.
And once that's been established, the next step is to make sure your choke and load combination is creating a uniform pattern, as any big gaps can also mean missed birds. So before you head out this spring, take the time to sight-in and pattern your shotgun. Here's how.

Sighting-in Certainty

Sight-in your shotgun while sitting on the ground with a solid backrest, such as a tree, just as you would when actually hunting. Rest your forward elbow on your knee to steady the gun. You won't have a table or bench rest with you when a gobbler comes in, so the more trigger time you have while simulating hunting conditions, the more natural it will become.

To begin, use 2 3/4-inch standard load shells with #4, #5 or #6 shot. Don't waste turkey shells or heavy game loads at this point—they're more expensive and their kick is brutal. Make two-inch targets by tracing a pop can bottom with a thick black marker on a wide piece of cardboard or paper. Draw an X through the circles for an aiming point.

Set up the targets at 10 yards. The shotgun's dense pattern at such a close range will be like a single projectile, making it easy to see exactly where it hits. An inch off-centre at this range is a complete miss or a wounded tom at 30 yards. Also, ol' three toes could walk by you that close, so you need to know where your gun hits at that range and how compact the pattern is.

If you have a bead or open sights on your shotgun, take a six o'clock hold under the centre of the X. If you have a scope or red-dot sight, centre the crosshairs or dot on the X. Shoot three times at three separate targets using the same aim point on each one. If the target centres get blasted away, your gun is hitting where you aim. If not, you can now begin adjusting to correct it.

Corrective Measures
If you only use a bead sight and are off the mark, first make sure you're properly mounting the gun to your shoulder. Weld your cheek to the stock and look straight down the barrel or rib with your master eye. If you raise your head off the stock, you'll miss high.

If your gun hits off the mark with a proper mount, and has an installed choke, ask a gunsmith to check it. If it's not the choke, a gunsmith can straighten the barrel in a jig or you may be able to get a new barrel for your gun. If the shotgun has a single bead, have a second bead installed mid-rib. Lining up both beads ensures proper aim and helps prevent you from lifting your head.

If you're off the mark with telescopic or other adjustable sights, make the adjustment and repeat three shots at fresh targets to verify your gun is putting the shot on centre. Take one more shot with a turkey load at a new target to see where it hits. Magnum and super-magnum turkey shot shells hit higher because they're higher velocity. Lower the sights again if this is the case, and take another shot to confirm you're dead on. Then shoot at a new target at 30 yards to confirm that the pattern is centred on the bull's eye at longer ranges, too. (Also see "Pattern Perfection" below.)

Avoid the temptation to compensate for a crooked shooting gun with "Kentucky windage"—aiming off the target to hit the target. That will cost you your tom when you're in an agony of nerves waiting for him to come into range and can't remember if you have to hold to the right or left of his neck. By first sighting-in your gun, you'll know that when you put the dot on his wattles, it'll deliver that tight swarm of pellets with rifle-like precision.
    
Pattern Perfection

The goal of patterning is to figure out what shotshell-and-choke combination creates the most uniform shot pattern, and how far downrange it can throw a lethal pattern. For turkey hunting, that lethal pattern is 100 pellets in a 10-inch circle—hunting heartbreak is assured if you don't pattern your gun accordingly.

To start, choose a few brands of shells to test with your turkey choke of choice (see "Combo considerations" on the next page). Sit on the ground as you would while turkey hunting, or shoot from a bench rest or gun vise. Use turkey-head targets with a 10-inch circle on them, or draw 10-inch circles with a thick marker on wide paper or cardboard (a 10-inch pot is great for tracing the circles). For an aiming point, colour in a two-inch bull's eye in the middle of the circle.

Patterning requires a fresh target for each shot. Start at 20 yards and take two shots with each type of shell. On each target, write down the distance and the shell used. If you suspect you wobbled off the target when you squeezed the trigger, shoot again with the same shell to give it a fair chance. If your best pattern is consistently off-centre, you can adjust your sights for that shell and try it again. If you can get it centred on the target and are pleased with it, stick with that brand of shell.

Now repeat the process at 30, 35 and 40 yards, again recording the type of shell and distance on each target. Once you've finished shooting, examine and compare the targets. What you want is a pattern with evenly spaced hits. Reject a pattern with gaps as big as your fist, because that could mean a missed or wounded turkey in an actual hunting situation. As well, count and record the number of pellets that hit within the 10-inch circle—your gun's maximum range will be the farthest distance it's able to punch 100 pellets into the circle.

Keep in mind that #6 shot, having so many pellets, can print 100 hits in a 10-inch circle at ranges beyond 50 yards through super-full chokes. But real turkeys aren't made of paper, and these smaller pellets don't retain enough energy to penetrate the skull and vertebrae reliably beyond 40 yards. Hevi-Shot retains its energy better than lead shot, and can therefore slightly extend the killing range of #6 shot.

Along with good set-ups and effective calling, knowing how your shotgun, choke and ammunition perform is key to a successful spring turkey hunt. So the next time you work that 20-pound gobbler into range, say goodbye to dejection and hello to the confidence of knowing you won't miss.

Pages: 1 ... 15 16 [17]